![]() Orion is proud to partner with BBC Sky at Night Magazine, the UK's biggest selling astronomy periodical, to bring you this article as part of an ongoing series to provide valuable content to our customers. Check back each month for exciting articles from renowned amateur astronomers, practical observing tutorials, and much more!
Orion is proud to partner with BBC Sky at Night Magazine, the UK's biggest selling astronomy periodical, to bring you this article as part of an ongoing series to provide valuable content to our customers. Check back each month for exciting articles from renowned amateur astronomers, practical observing tutorials, and much more!
The Wonder of Satellites
Astro imager Will Gater explores the photo opportunities presented by the myriad spacecraft that can be seen speeding overhead through the night.
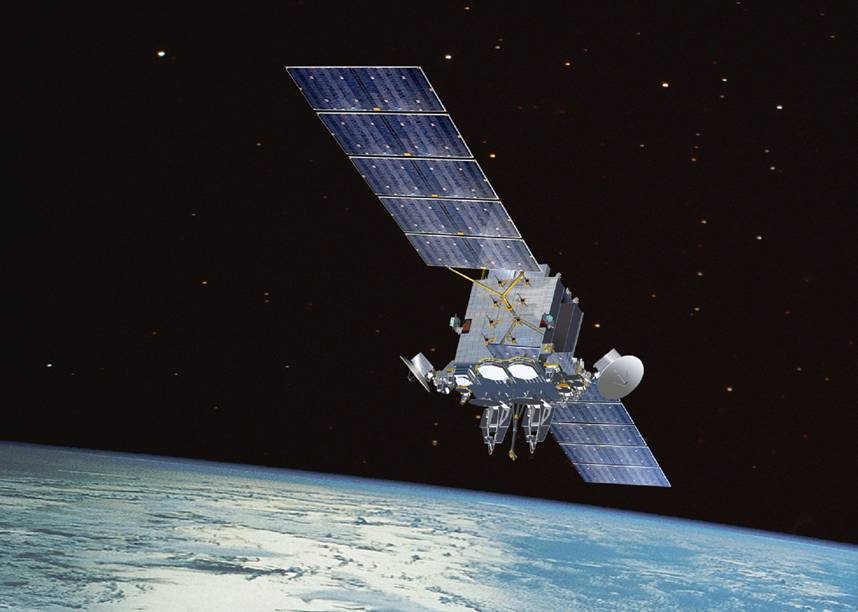
AEHF (Advanced Extremely High Frequency) Satellite. Image By USAF (Los Angeles AFB) [Public domain], via Wikimedia Commons
Nightscapes with a bit of Sparkle
Nightscape images that contain glinting Iridium flares or space stations have been a staple of astro-imaging for decades. For beginners, they're great targets to practice your skills on, and it's possible to get really striking images with a basic setup consisting of nothing more than a DSLR and tripod. If you have a bit more experience, don't dismiss shooting a satellite or space station; even advanced photographers can find fresh challenges in experimenting with the framing and foreground of such photos, and in finessing the quality of the final shot. Done well, these pictures can really spark the imagination in ways that other types of astro-images might not.
The timing, brightness and location on the sky of any potential Iridium flares is dependant on your location, so — just as with ISS and other bright-satellite passes — in order to find out when and where one will be visible from your site you'll need to consult a website like Heavens Above (www.heavens-above.com). Once you have this information you can set about planning your shot.
The free planetarium software Stellarium (www.stellarium.org) is particularly useful for this as you can use its plugins to overlay a rectangle showing the size of your camera's field of view on the sky. By cross-referencing the Stellarium view with the information and star chart from Heavens Above, you can identify the path and position of whichever satellite you're aiming to catch and try out different compositions. Stellarium can show the track of the ISS on the sky, and the paid app SkySafari Plus can also perform the same task.
Shooting a series of consecutive 10- to 20- second exposures at a mid-range ISO with a DSLR, kit lens and static tripod will pick up most bright satellite passes. With Iridium flares, aim to start capturing images about 90 seconds prior to the predicted flare time and end the series about the same amount of time after the flare reaches its brightest; this way you'll capture a pleasing trail that slowly builds in brightness, peaks, then fades away. You can then bring the series of images you've captured into processing or stacking software and combine them, so that the short trail in each photo joins the others to form a longer one.
Since most satellites zip across the sky, capturing a series of photos from a static tripod will result in gaps in the final 'combined' satellite trail due to the short delay between exposures. To get around this you can mount your camera on a tracking mount and take one, much longer, single exposure. This requires balancing the exposure length — which will need to be several minutes — with the lens aperture, ISO setting and sky brightness, but can produce attractive unbroken satellite trails against rich, starry skies. Remember, if you do this any foreground will be slightly blurred.
A Split-Second Spectacular
One of the most exciting areas of satellite astrophotography to develop in recent years is imaging the International Space Station passing in front of the Sun or Moon. Imaging these 'transits' requires extensive planning, but the resulting pictures are extraordinary. A typical transit might last seconds, — sometimes much less — and will only be visible from within a narrow strip of Earth's surface. To find out when an ISS transit is visible near your location you can use the excellent ISS Transit Finder (transit-finder.com). If you intend to image a solar transit, where the space station is silhouetted against the disc of the Sun, you'll need to use a certified solar filter for your telescope and be sureto remove any finderscopes. Here are the key steps required to capture this thrilling phenomenon with a scope and DSLR camera.
Step 1: Plan
Find out when a transit will be visible nearby using the ISS Transit Finder website. You may have to travel to be in a position to capture the event. Use planetarium software to check where in the sky the Sun or Moon will be.
Step 2: Setup
Next set up your scope and have it track at the solar or lunar rate (depending on your target). If you're imaging the ISS transiting the Sun, fit a specialist, certified solar filter and remove any finder scopes.
Step 3: Focus and exposure
Focus the view — use the terminator if viewing the Moon, or sunspot or the solar limb if viewing the Sun. Whether you capture stills or video, make sure that the exposure length is very short so that the ISS does not blur.
Step 4: Capture video or a rapid burst of stills
Start capturing video or a burst of stills as the moment of the transit approaches; that way if there is a slight error in your timing you'll still get the shot. For a DSLR video use the highest frame rate that the camera allows.
Step 5: Review, extract and process
Review and process the frames from our video or still images that show the ISS. Software such as PIPP (https://sites.google.com/site/astropipp) can extract still frames from videos. Then process and enhance the images.
Catch a Dragon
If, like us, you remember fondly the days of NASA's Space Shuttle, you may well recall that on occasions the spacecraft and its — just-detached — external fuel tank would be visible passing over the UK shortly after launch. There was nothing quite like watching the rocket roar off the pad live on NASA TV then seeing the very same shuttle and orange fuel tank — both appearing as points of light; the orbiter appearing white, the fuel tank a subtle ochre tint — silently glide overhead. Though the Space Shuttle is no longer flying, there's still occasionally a chance to catch a similar spectacle thanks to one of the new generation of ISS-servicing spacecraft: SpaceX's Dragon capsule.
Whether you'll be able to see the capsule on its way to the ISS just after lift off depends on the conditions of its launch. For the capsule to be visible, it needs to be dark or deep twilight in the UK, but the Dragon itself has to be in sunlight as it flies over. Helpfully, the CalSky website (www.calsky.com) publishes visibility predictions for some of the Dragon spacecraft around the time of scheduled launches to the ISS; you simply input your location details and it will tell you if the Dragon will make any visible passes. The pass you want to look out for — if it's listed — is the one that's about 20 minutes after the expected launch time, as that'll be the Dragon making its first flyover after departing the Florida coast. It's worth keeping an eye on either the NASA TV or SpaceX online video stream that usually accompanies the launch too, as it'll let you know if the lift off gets scrubbed.
One of the things that's so exciting about catching the ISS-bound Dragon just after lift off is that, from here in the UK, it's not just the capsule you get to see. Dragon is propelled into orbit by a SpaceX Falcon 9 rocket, and the separated upper stage of that rocket is visible next to the capsule as it passes over.
Not only that, but Dragon itself jettisons two solar-panel covers after lift-off and these appear either side of the spacecraft as two points of light which repeatedly brighten and fade during the pass as they tumble away. It's a truly electrifying sight and one that can be captured easily using a DSLR, static tripod and 50-100mm lens, and the same basic technique described in 'Nightscapes with a sparkle'. We've even been able to film Dragon firing one of its thrusters during a pass, using a DSLR and a telephoto lens.
The ISS up Close
Ordinarily, high frame rate cameras are used to create detailed images of targets like the lunar surface and planets. But it's also possible to use them to capture high-resolution shots of the ISS showing its modules and solar arrays.
The primary challenge with this type of imaging is tracking the rapidly-moving ISS, since most high frame rate camera and telescope combinations will provide a small field of view that is tricky to keep centred on the station.
Tracking is typically done manually with the help of an accurately aligned finderscope and the mount's handset set at the highest possible slew rate or, in some cases, carefully manoeuvring the telescope by hand. Essentially you start your computer recording a video from the camera and hope that at some point during the pass your guidance causes the ISS to race through the frame.
Focusing can be done in advance on a bright star — or even better, the Moon — while the correct exposure length will depend on the setup you're using; crucially it'll need to be short enough to stop the ISS from blurring and this may mean that you have to greatly increase the camera's gain to compensate.
Fade to Orange
The reason it's possible to see the ISS against the starry sky is that, at the altitude of its orbit, it's still illuminated by the Sun. Sometimes, however, the ISS will disappear into the darkness of Earth's shadow. Just before it does that you can see and image one of the most beautiful satellite phenomena of all: the ISS experiencing 'orbital sunset'.
As the station slips into the shadow, the Sun sinks below the Earth's limb as seen from the ISS in orbit. In the last moments leading up to that 'sunset' the whole structure is bathed in a deep-orange light. And because that light is the same sunlight that illuminates the station as it passes over us, from the ground the ISS turns from a brilliant white to a deep orange-red, before disappearing.
This effect can be seen clearly in binoculars from suburban sites, but is a particularly rewarding target for imagers and naked-eye observers under darker skies. The passes in which the ISS moves into Earth's shadow are clear in the night-sky charts that accompany each ISS pass prediction on Heavens Above (www.heavens-above.com); they're the ones where the pass seems to abruptly 'stop' amongst the stars. Point your camera in the direction of that end point and — with a long exposure of a minute or so using a DSLR on a tracking mount — you should pick up the gradual fade to orange in the ISS's trail.
What is an Iridium flare?
Iridium 'flares' appear as a brief and slow-moving point of light that brightens rapidly and fades just as fast. They are produced when the antennas of any of the numerous of Iridium communications satellites catch the Sun's light and reflect it back to Earth. In January, the first in a new fleet of Iridium satellites was launched. The antennas of these new satellites aren't as reflective, so the days of Iridium flares could be numbered.
ABOUT THE WRITER
Will Gater is an astronomy journalist, author and presenter. Follow him on Twitter at @willgater or visit willgater.com
Copyright � Immediate Media. All rights reserved. No part of this article may be reproduced or transmitted in any form or by any means, electronic or mechanical without permission from the publisher.